Cutting consistent and geometrically identical triangle shapes can be a chore! Learn how the QuiltCut2 All-in-One Fabric Cutter is the perfect solution to cut identical triangles quickly and with much less hassle. Our customers love the machine like consistency of cut from our system. Whether you need to make 50 or 500 triangles the QuiltCut2 is your answer.
Whether you need to make half-square, quarter-square, or equilateral triangles, our QuiltCut2 can make the process quick and pain free. The part we love the most is that you can get any size you need without any additional parts or accessories. Click through sections below to see why we love our QuiltCut2 and know you will too!
Half-Square Triangles |
Quarter-Square Triangles |
Equilateral Triangles |
Equilateral Triangles from one Strip |
Please Note: All cut lines were added for clarity. Your fabric will not be marked using the QuiltCut2.
Step 1:
After cutting squares remove the Speed Gauge and rotate the Cutting Guide left to 45°, taking care not to disturb the pieces on the Cutting Mat.
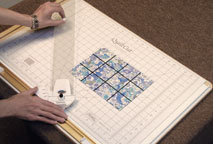
Step 2:
Slide the Cutting Guide until the edge rests diagonally on one of the squares, touching opposite corners. Make the first cut along the side of the Cutting Guide.
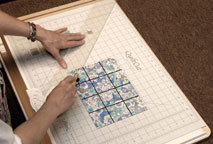
Step 3:
Slide the Cutting Guide to the next position, aligning the edge across the next square(s), and make the next cut.
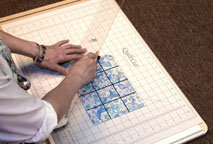
Step 4:
If you have moved the Cutting Guide from one side of the system to the other and still have triangles to cut, move the Cutting Guide to the Side Rail, then change the angle to the opposite 45° angle.
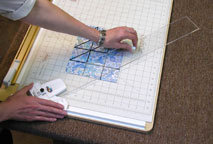
Step 5:
Lift the knob on the Cutting Guide and slide the Head to align the Speed Gauge edge at the cut made in step 4.
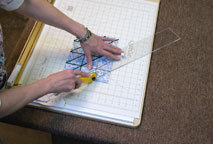
Step 2:
After cutting the half-square triangles, change the Cutting Guide to the opposite 45° angle. Remove the Side Rail if necessary to make room.
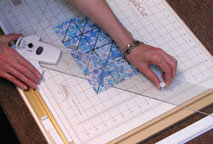
Step 3:
Slide the Cutting Guide into place with its edge lying across the half-square-triangle corners as shown. Lift the knob on the Cutting Guide when you move it so you won’t disturb the pieces on the Cutting Mat. Cut the quarter-square triangles.
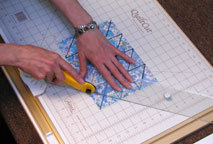
Step 4:
Continue cutting quarter-square triangles until you are finished.
Cutting Equilateral Triangle Shapes
Each side of an equilateral triangle is the same length, and each angle is 60°. The process to cut an equilateral triangle follows the same steps for cutting diamond shapes. Two great unique shapes with the same basic process using the QuiltCut2! Use these triangles with hexagons for interesting quilt blocks.
Step 1:
Cut the number of strips needed for your Equilateral Triangles.
Step 2:
Place the Cutting Guide on the Clamp Bar Rail and rotate to the left 60° position. To conserve fabric, offset the strips using the Cutting Guide for reference as shown. Place the Cutting Guide across the strips as shown and cut off the strip ends.

Step 3:
Slide the Cutting Guide to align the Speed Gauge with the first cut and make the next cut. Repeat by sliding the Cutting Guide and aligning the Speed Gauge to make as many cuts across the strips as you can. You have cut 60° diamonds from the strips.

Step 4:
Rotate the Cutting Guide to the opposite 60° position. Slide the Cutting Guide to align the edge at the intersections of the cuts as shown. Cut across the strips. Repeat by sliding the Cutting Guide to make as many cuts across the strips as you can.

Step 1:
Align strip parallel to the Clamp Bar. Place the Cutting Guide on the Clamp Bar, rotate to the left 60° position and set the edge across the end of the strip. Make the first cut.

Step 2:
Rotate the Cutting Guide to the opposite 60° position. Slide it to align with the top “point” of the strip as shown. Make the next cut.

Step 3:
Rotate the Cutting Guide to the first 60° position and align with lower “point” of triangle as shown. Make the next cut.

Step 4:
Repeat last two steps, cutting the number of triangles you need.
Final Result:
Easily cut triangle shapes however you need them. On of our favorite features is the ability to cut multiple size triangles using the same method. Never reach for a bigger ruler or die with our system. The QuiltCut2 can cut any straight edged shape quickly, efficiently, and with precision.
